 Pin
Pin
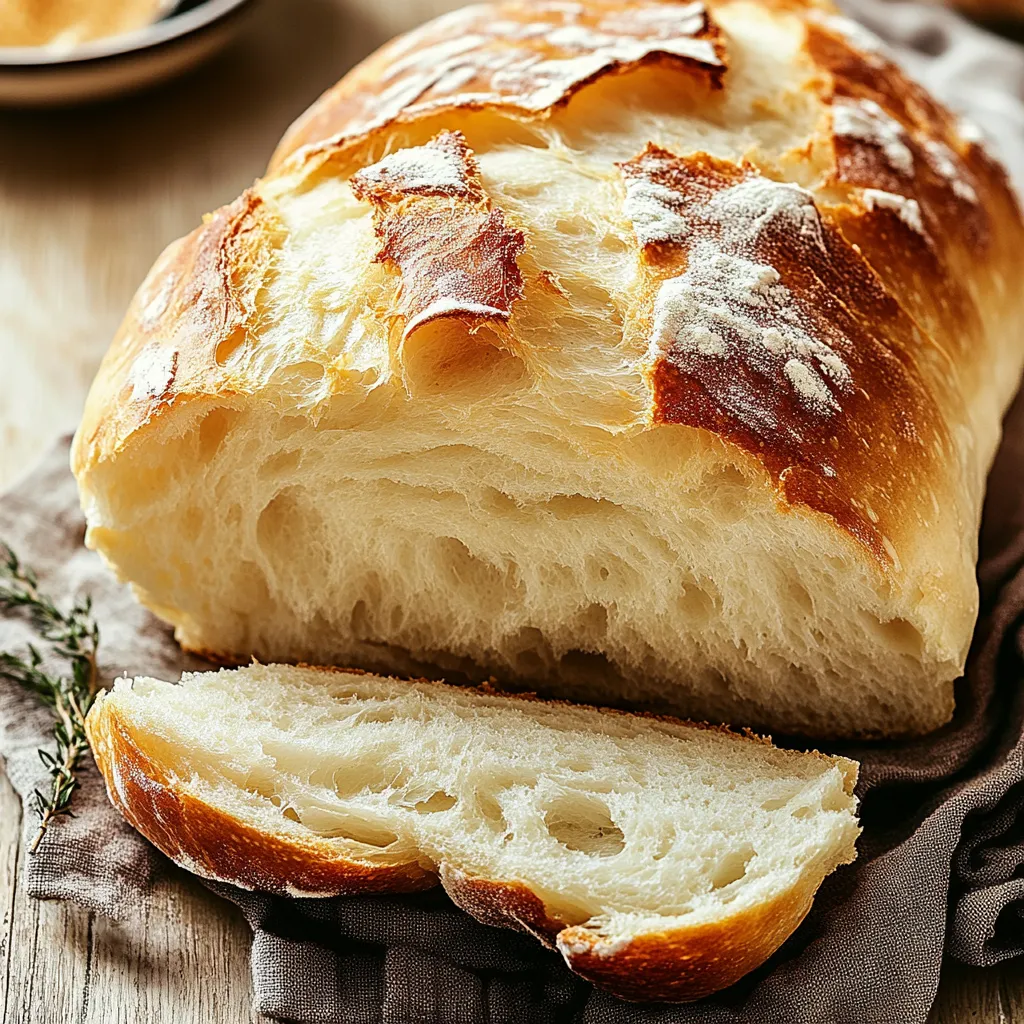
This timeless homemade bread recipe brings the comforting aroma and taste of grandma's kitchen right to your home. With a golden crust and soft, fluffy interior, this bread is perfect for everything from morning toast to hearty sandwiches, capturing the simple joy that only freshly baked bread can deliver.
I first learned this recipe during Sunday baking sessions with my grandmother. The way she effortlessly created something so delicious from such simple ingredients seemed like magic to me as a child. Now I make this bread whenever I need a dose of nostalgia or want to impress dinner guests without much effort.
Ingredients
- Warm water: Ensures proper yeast activation and the ideal dough temperature
- Active dry yeast: Creates the perfect rise and texture
- Granulated sugar: Feeds the yeast and adds subtle sweetness to balance flavors
- Unsalted butter: Enriches the dough for a tender crumb
- Salt: Enhances flavor and strengthens gluten structure
- All purpose flour: Works perfectly but bread flour creates extra chewiness if available
Step-by-Step Instructions
- Activate the Yeast:
- Combine warm water at exactly 110°F with yeast and sugar in a small bowl. The temperature matters tremendously here as too hot will kill the yeast while too cool will prevent proper activation. Watch for a foamy surface after about 5 minutes which confirms your yeast is alive and ready to work its magic.
- Make the Dough:
- Combine your foamy yeast mixture with melted butter and salt in a large mixing bowl. Add flour gradually, one cup at a time, stirring after each addition. This gradual approach prevents flour clouds and ensures even hydration. You'll notice the mixture transforming from sticky to a cohesive dough as you incorporate the final cup.
- Knead the Dough:
- Turn your dough onto a lightly floured surface and knead for a full 8 to 10 minutes. Proper kneading develops the gluten network that gives bread its structure. The dough should feel smooth and elastic, almost like a soft earlobe when properly kneaded. Place in a greased bowl and cover completely with a clean kitchen towel for the first rise.
- Shape and Second Rise:
- After the dough has doubled in size, gently punch it down to release air bubbles. Shape it into a loaf by patting into a rectangle and rolling tightly from one short end to the other. Tuck ends under and place seam side down in your greased loaf pan. The second rise creates additional flavor and ensures proper texture in the final bread.
- Bake the Bread:
- Place your bread in a preheated 375°F oven on the middle rack for even heating. The crust will begin to brown after about 15 minutes. Bake until deeply golden and hollow sounding when tapped on the bottom, about 25 to 30 minutes total. This creates the perfect balance between a delicious crust and tender interior.
- Cool and Serve:
- Allow your bread to rest in the pan for 5 minutes before transferring to a wire rack. This brief rest period makes removal easier. Cool for at least 20 minutes before slicing to prevent the bread from becoming gummy. Serve with salted butter, honey, or your favorite jam for a true taste of homemade goodness.
This bread holds special memories for me because it was the first recipe my grandmother taught me to make by feel rather than strict measurements. She would say you could tell when the dough was ready by how it felt in your hands not by the exact amount of flour. That lesson about intuitive cooking has stayed with me throughout my culinary journey.
The Science of Bread Making
The magic of bread making happens when yeast consumes sugars and produces carbon dioxide gas that gets trapped in the gluten network. This is why proper kneading is so important it develops the protein structure that captures those air bubbles. Meanwhile the fermentation process during rising creates the complex flavors that distinguish homemade bread from commercial varieties. Understanding this science helps you troubleshoot any issues that might arise during your baking process.
Storage and Freshness Tips
Homemade bread lacks preservatives which means different storage approaches than store bought bread. For daily use keep your bread at room temperature in an airtight container or bread box. Avoid refrigerating as this actually accelerates staling. For longer storage slice the completely cooled loaf and freeze with parchment paper between slices for easy thawing. Refresh day old bread by lightly sprinkling with water and heating in a 300°F oven for 5 to 10 minutes.
Troubleshooting Common Issues
If your bread isn't rising properly check the expiration date on your yeast and ensure your water temperature is correct. Too much flour results in dense bread while too little creates a shape that spreads rather than rises. Uneven baking often happens when ovens have hot spots rotate your pan halfway through baking. If your crust is too dark but the interior needs more time cover loosely with foil for the remainder of baking.
Delicious Variations
This versatile dough forms the base for numerous variations. Add herbs like rosemary and thyme for a savory option perfect alongside soups and stews. Incorporate cinnamon and raisins for a breakfast treat. For a rustic look shape into a round boule instead of using a loaf pan and slash the top with a sharp knife before baking. During fall months add pumpkin puree and warming spices for a seasonal twist that makes exceptional French toast.
Recipe Questions & Answers
- → How do I ensure my yeast activates properly?
Use warm water around 110°F (45°C) to combine with the yeast and sugar. Let it sit for 5-10 minutes until foamy. If it doesn’t foam, the yeast may be inactive.
- → Can I make this bread whole wheat?
Yes! Simply replace 1 cup of all-purpose flour with whole wheat flour to make a healthier variation without sacrificing texture.
- → How do I get a softer crust?
Brush the top of the bread with melted butter immediately after baking for a softer and shinier crust.
- → Can I freeze this bread?
Yes, you can freeze the bread! Place it in an airtight container or wrap in plastic wrap, and freeze for up to 3 months. Defrost at room temperature when ready to use.
- → How do I know the bread is done baking?
The bread is done when the top is golden brown, and it sounds hollow when tapped. You can also check if the internal temperature reaches 190°F (88°C).
- → What can I serve with this bread?
This bread pairs beautifully with butter, honey, jam, or even savory spreads like cream cheese or garlic butter. It's also perfect for sandwiches.