 Pin
Pin
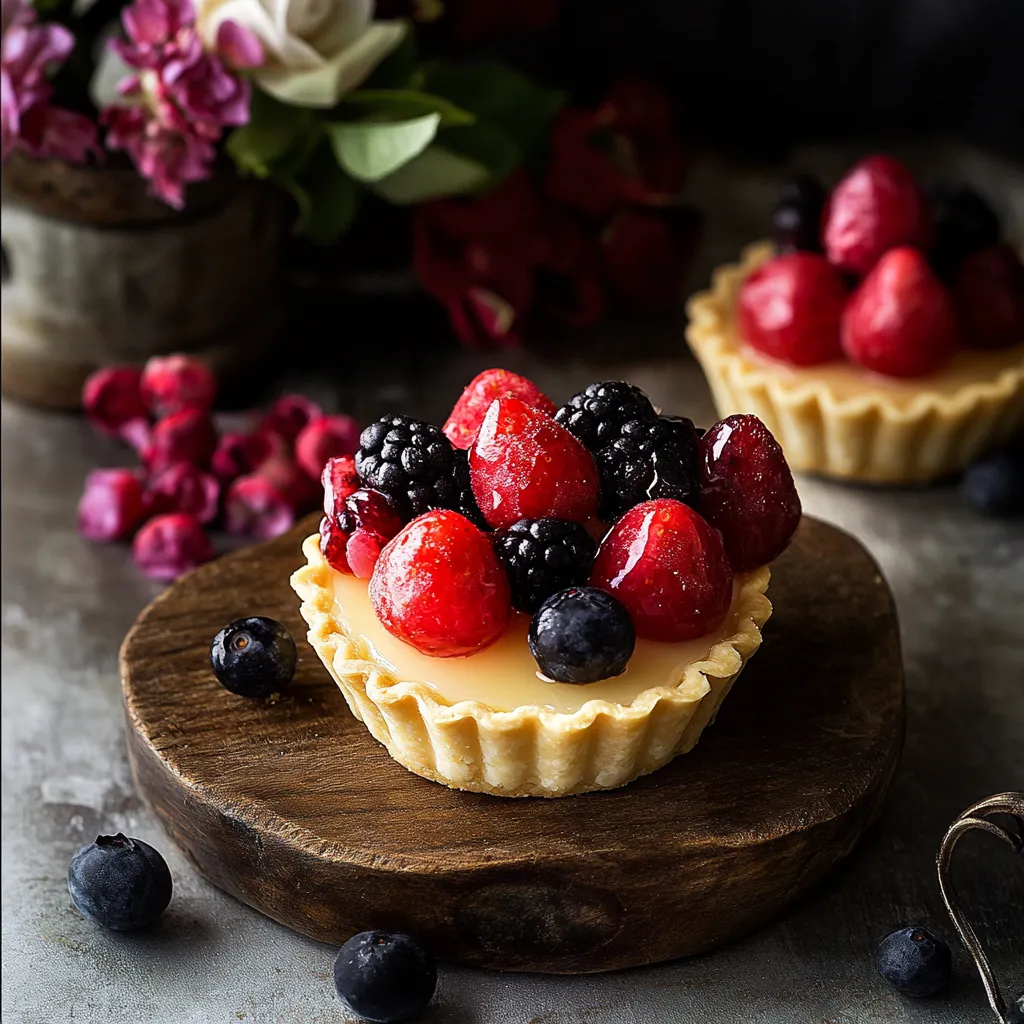
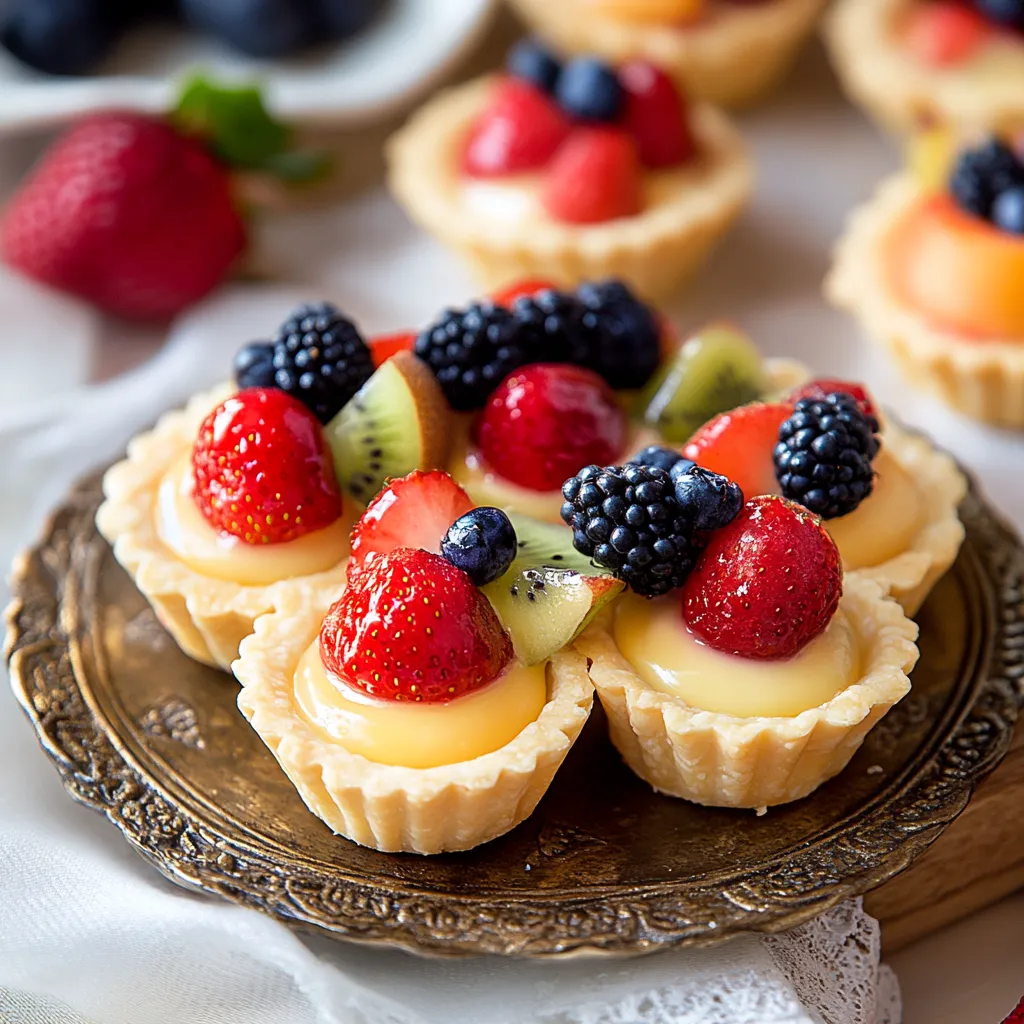
These mini fruit tarts combine buttery shells with silky pastry cream and fresh fruit for a dessert that looks as beautiful as it tastes. I first discovered this recipe when planning a Mother's Day brunch and they've become my signature dessert for all special occasions. The contrast of the crisp tart shell against the smooth vanilla pastry cream makes each bite perfectly balanced.
I originally created these for a garden party, and guests were convinced I had purchased them from a professional bakery. Now they're requested at every family gathering.
Ingredients
- Unsalted butter: Provides the rich base for the tart shells, look for European style butter with higher fat content for best results
- Granulated sugar: Sweetens both components without being overwhelming
- Whole milk: Creates the creamiest pastry cream; avoid substituting lower fat options
- Egg yolks: Give the pastry cream its luxurious texture and golden color
- All purpose flour: Forms the tender shell foundation
- Cornstarch: Thickens the pastry cream to the perfect consistency
- Vanilla extract or paste: Infuses the cream with warm flavor; use real vanilla for best results
- Fresh fruit: Adds color and natural sweetness; choose whatever looks best at the market
Step-by-Step Instructions
- Make The Pastry Cream:
- Simmer milk mixture: Heat milk, vanilla, and salt until just steaming but not boiling. The milk should form small bubbles around the edges of the pan. This gentle heating prevents scorching and creates the perfect base for tempering.
- Prepare egg mixture: Whisk egg yolks, sugar, and cornstarch until thick and pale yellow. The mixture should form ribbons when the whisk is lifted. This thorough mixing ensures no lumps of cornstarch remain.
- Temper the eggs: Slowly add hot milk to egg mixture while constantly whisking. This gradual addition is crucial for smooth cream without scrambled eggs. Pour very slowly at first, then increase speed as the mixture warms.
- Cook until thickened: Return everything to the saucepan and cook over medium heat until bubbling and thickened. The transformation happens quickly near the end, changing from a thin liquid to a pudding consistency within moments.
- Strain and chill: Pour through a fine mesh strainer into a clean bowl, then cover with plastic directly on the surface. This removes any tiny lumps and prevents a skin from forming during chilling.
- Prepare Tart Dough:
- Cream butter mixture: Beat butter, sugar, and salt until light and combined. This initial creaming creates tiny air pockets for a tender crust.
- Add egg and flour: Mix in egg completely, then add flour just until incorporated. The dough should look somewhat shaggy but hold together when pressed. Overmixing develops gluten which makes tough shells.
- Chill thoroughly: Shape into discs, wrap, and refrigerate at least 2 hours. This resting period allows the gluten to relax and the butter to solidify, preventing shrinkage during baking.
- Roll and shape: Roll chilled dough to 1/8 inch thickness and cut circles larger than your tart pans. Work quickly to keep the dough cold, returning it to the refrigerator if it becomes too soft.
- Bake tart shells: Chill filled tart pans before baking until golden brown. The initial chilling helps prevent the dough from shrinking during baking, while the fork pricks allow steam to escape.
- Assemble Tarts:
- Fill cooled shells: Pipe pastry cream into completely cooled tart shells, smoothing with an offset spatula if desired. The piping bag gives you more control than spooning.
- Arrange fruit: Place prepared fruit in an attractive pattern on top of the cream. I like to create simple patterns using different colors and textures.
- Glaze if desired: Brush fruit with thinned jam for a professional shine and to help preserve freshness. This step is optional but adds a beautiful glossy finish.
 Pin
Pin
The pastry cream is truly the heart of this recipe. I spent years perfecting it after learning the technique from my grandmother who insisted that straining it made all the difference in creating that silky smooth texture everyone loves.
Storage Tips
The baked unfilled tart shells can be stored at room temperature in an airtight container for up to 3 days. For longer storage, freeze them for up to a month and thaw at room temperature when ready to use.
Pastry cream must be refrigerated and will keep for up to 5 days. Always cover with plastic wrap directly touching the surface to prevent a skin from forming. If it seems too firm after refrigeration, whisk vigorously to restore its creamy texture.
Once assembled, the fruit tarts are best enjoyed within 24 hours. The moisture from the pastry cream will eventually soften the crisp tart shell, though brushing the inside of the shell with melted white chocolate creates a moisture barrier that can extend freshness.
Perfecting Your Pastry Cream
The secret to silky smooth pastry cream lies in the tempering process. Always add the hot milk to the egg mixture very slowly while whisking constantly. I learned through many batches that rushing this step leads to scrambled eggs instead of smooth cream.
If your pastry cream develops lumps despite careful tempering, all is not lost. Simply pour it through a fine mesh strainer while still warm to remove any cooked egg pieces. Whisk vigorously after straining to restore smoothness.
For a flavor variation, try infusing the milk with citrus zest, cinnamon sticks, or cardamom pods before heating. Remove these additions before tempering with the eggs for subtle flavor notes that complement the fruit topping.
Fruit Selection and Arrangement
The beauty of these tarts comes from the colorful fruit arrangement. I like to use a combination of berries, kiwi, and stone fruits when in season. Always pat fruits dry after washing to prevent excess moisture from making the pastry cream runny.
Consider the season when selecting fruits. Summer brings strawberries, blueberries, and peaches, while winter might call for citrus segments, pomegranate arils, or poached pears. The versatility of this recipe makes it appropriate year round.
For special occasions, try arranging the fruit in patterns like concentric circles, flower designs, or simple geometric arrangements. The contrast of colors creates a professional appearance that will impress guests before they even take a bite.
Recipe Questions & Answers
- → How do I prevent tart shells from shrinking?
Make sure the dough is cold before baking and avoid overstretching it when placing it into tart pans. Chill the shells before placing them in the oven.
- → What fruits work best for mini tarts?
Fresh fruits like strawberries, blueberries, kiwi, and peaches are ideal for their vibrant colors and balance of sweetness and tartness.
- → Can I make the tart dough in advance?
Yes, you can prepare the tart dough up to 24 hours ahead and keep it refrigerated. Alternatively, freeze it for a longer storage duration.
- → How do I keep tarts from getting soggy?
Brush the bottoms of the tart shells with melted white chocolate before adding the pastry cream. This creates a barrier to prevent sogginess.
- → Can I use pre-made tart shells?
Absolutely! Using pre-made tart shells can save time and simplify the process while still delivering great results.
- → How do I glaze the fruit on top?
Mix a tablespoon of jam (apricot or your choice) with a bit of water and use a pastry brush to coat the fruit for a shiny, polished look.