 Pin
Pin
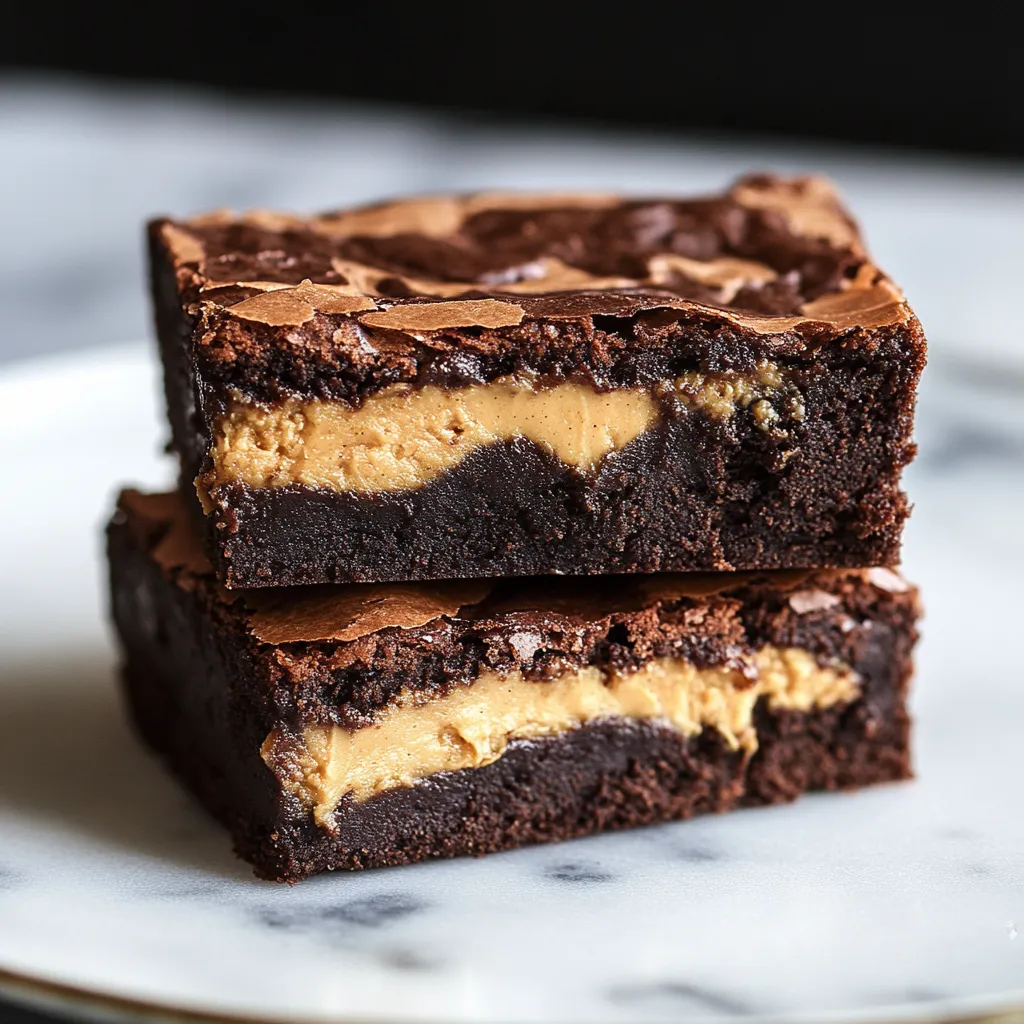
This decadent peanut butter stuffed brownie recipe transforms ordinary brownies into an extraordinary dessert experience. The fudgy chocolate base cradles a thick, luscious layer of pure peanut butter, creating the ultimate indulgence for those who crave that perfect chocolate-peanut butter combination.
I first created these brownies for a potluck where I wanted to bring something memorable. The moment people bit into that unexpected layer of peanut butter, their eyes widened with delight. Now these brownies are my signature dessert whenever I need to guarantee smiles.
Ingredients
- Conventional creamy peanut butter: Provides the perfect consistency. Natural peanut butter will separate and ruin the texture of your filling.
- Semisweet baking chocolate: Creates a deeper flavor than cocoa powder alone. Look for bars with 60% cacao for ideal richness.
- Unsalted butter: Allows you to control the exact salt level in the recipe. Make sure it's at room temperature for easier mixing.
- Granulated sugar: Balances the richness of chocolate and peanut butter while helping create that crackly brownie top.
- Extra egg yolk: Contributes to the fudgy texture that makes these brownies irresistible.
- All purpose flour: Provides just enough structure without making the brownies cakey.
- Unsweetened cocoa powder: Intensifies the chocolate flavor. Dutch processed works best for a smoother taste.
- Fine salt: Enhances all the flavors and balances sweetness. Diamond Crystal kosher salt is my preference.
Step-by-Step Instructions
- Prepare the Peanut Butter Layer:
- Warm the peanut butter briefly in the microwave until just pourable. Line your baking pan with parchment paper ensuring an overhang for easy removal later. Spread the peanut butter evenly across the bottom of the pan. This will become your middle layer so aim for consistent thickness. Freeze the peanut butter for a full hour until completely solid. The freezing step is crucial as it allows you to handle the peanut butter as a solid sheet.
- Create the Brownie Base:
- Melt chocolate and butter together using short microwave bursts and stirring frequently to prevent scorching. The mixture should be completely smooth and glossy. Add sugar while the mixture is still warm and whisk vigorously. This step creates that beautiful crackly top brownies are known for. Allow the mixture to cool slightly before adding eggs to prevent scrambling them.
- Develop the Batter:
- Add eggs, extra yolk, and vanilla to the chocolate mixture and whisk for a full minute. This extended mixing creates the perfect chewy texture. Gently fold in the dry ingredients using a spatula just until combined. Overmixing at this stage will develop too much gluten resulting in cakey rather than fudgy brownies.
- Assemble and Bake:
- Pour half the brownie batter into your prepared pan creating an even layer. Carefully place your frozen peanut butter sheet directly on top of this first layer of batter. Cover completely with remaining brownie batter ensuring no peanut butter is exposed. Bake until the center is just barely set with a slight jiggle. The brownies will continue cooking from residual heat after removal from oven.
My favorite moment with these brownies was watching my chocolate hating nephew devour three in one sitting. The magic of peanut butter converted him instantly and now he requests these for every birthday. Something about that sweet salty combination simply transcends preferences.
Perfect Pairings
These indulgent brownies pair beautifully with contrasting elements that balance their richness. A scoop of vanilla ice cream creates temperature contrast while cutting through the density. For special occasions, try serving with fresh raspberries whose tartness perfectly complements the sweet chocolate and nutty peanut butter flavors. A cold glass of milk remains the classic accompaniment, allowing you to fully appreciate each fudgy, peanut buttery bite.
Storage Solutions
Room temperature storage works perfectly for 2-3 days in an airtight container. The brownies remain moist and the peanut butter stays perfectly set. For longer storage, refrigerate for up to 5 days, which has the delightful side effect of making them even fudgier. These brownies also freeze exceptionally well for up to 3 months. Wrap individual squares in plastic wrap then place in a freezer bag. Thaw at room temperature for an hour before enjoying, or microwave for 15-20 seconds for that just baked warmth.
Smart Substitutions
While conventional peanut butter creates the ideal filling, those with allergies can substitute cookie butter or sunflower seed butter for similar texture. Almond butter works too but requires longer freezing time due to its thinner consistency. For the chocolate component, dark chocolate can replace semisweet for a more intense experience. Those preferring less sweetness might reduce sugar to 3/4 cup without affecting texture. For gluten sensitive guests, a measure for measure gluten free flour blend works perfectly in this recipe.
Recipe Questions & Answers
- → Can I use natural peanut butter?
No, it’s recommended to use conventional creamy peanut butter as natural peanut butter may separate or alter the texture.
- → Can I store the brownies?
Yes, the brownies can be kept in an airtight container for up to 3 days at room temperature or 5 days in the fridge. Chilling makes them extra fudgy!
- → Can I double this recipe?
Yes, simply use a 9x13 pan and bake for the same amount of time. Makes double the quantity while maintaining the same delicious results.
- → Can I reduce the amount of peanut butter?
Yes, feel free to use 1 cup or 3/4 cup of peanut butter if you prefer less filling in your brownies.
- → How do I get clean brownie slices?
Let the brownies cool completely before slicing. For the cleanest cuts, use a sharp knife and wipe it clean between cuts.