 Pin
Pin
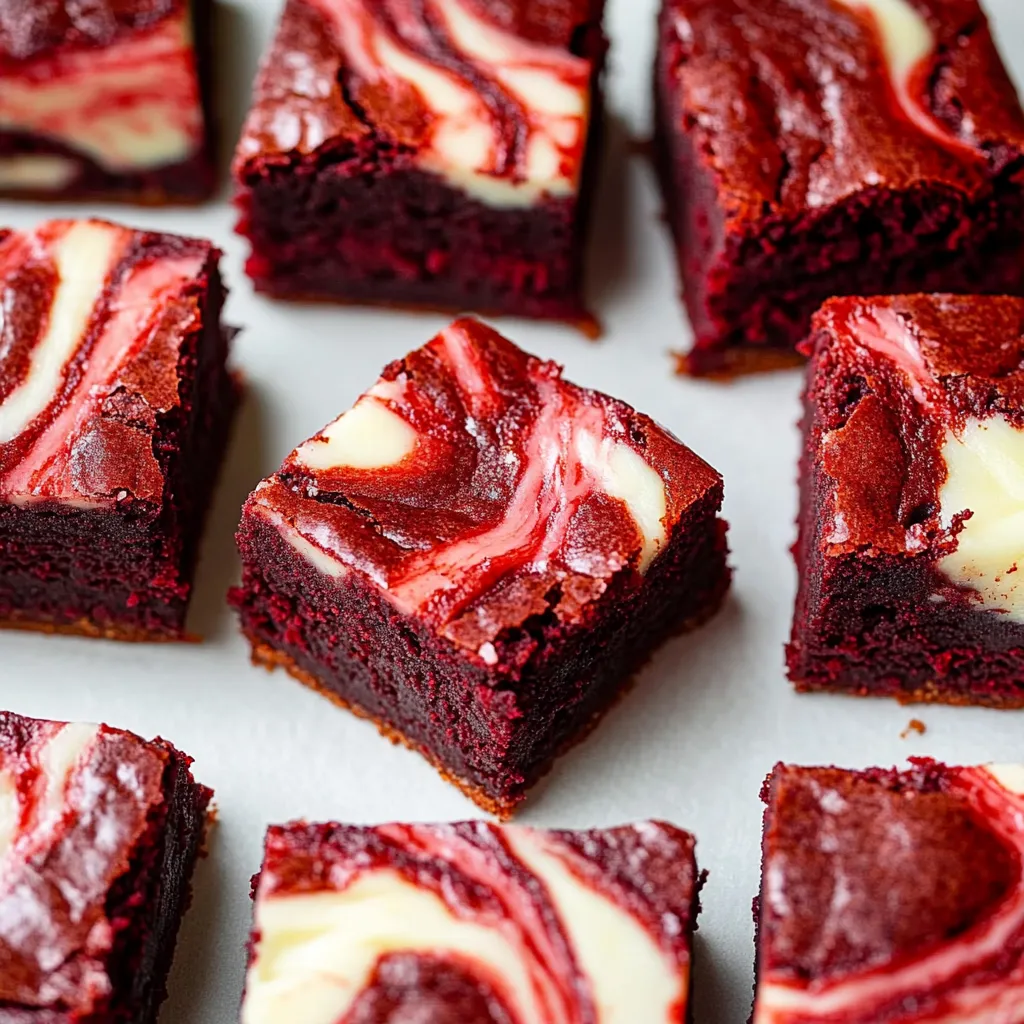
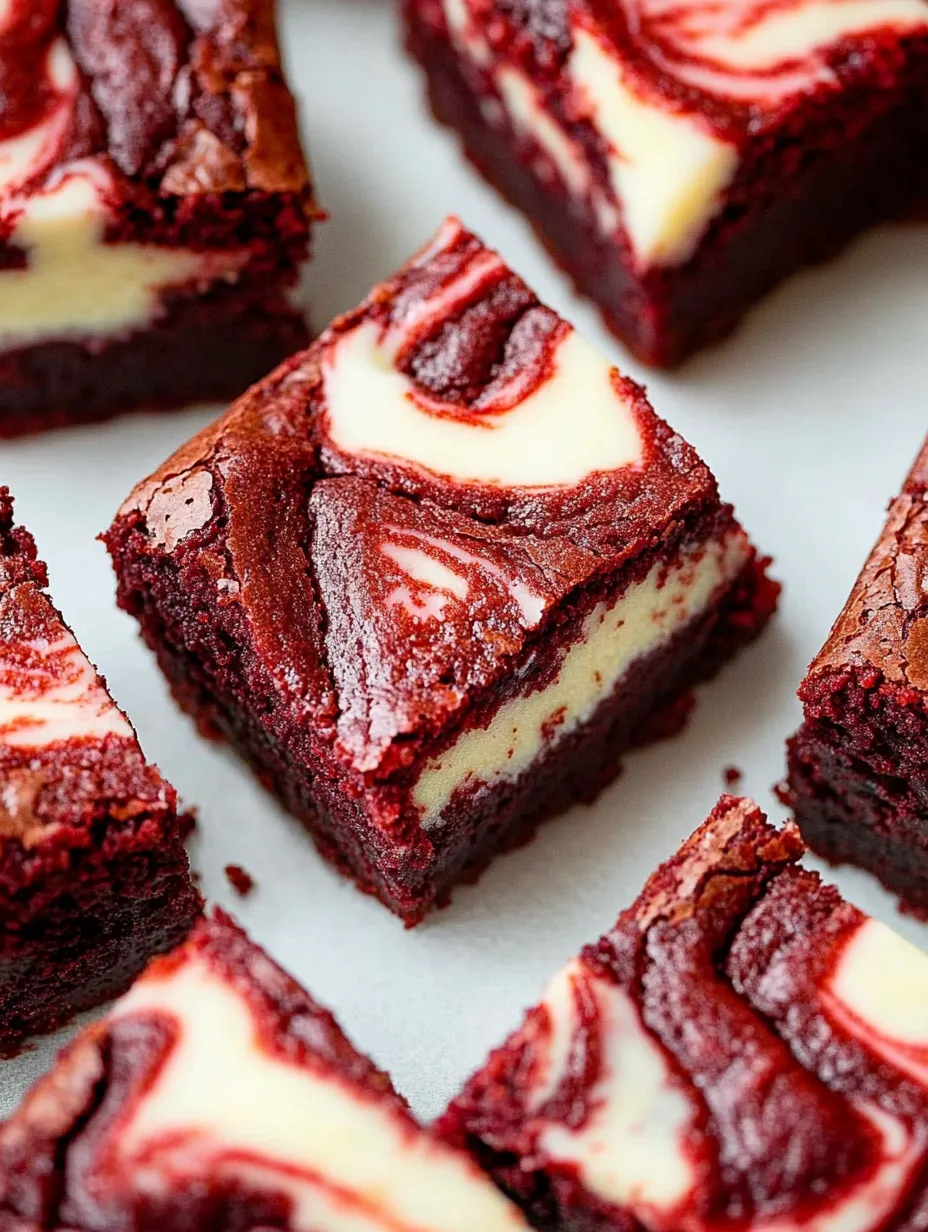
These decadent red velvet brownies pair fudgy chocolate with creamy cheesecake in every bite making for a party-worthy treat that is surprisingly simple to prepare at home. They are my go-to answer when I want something impressive but manageable for gatherings or just a weekend sweet fix.
I first made these when my sister was visiting and we devoured the whole pan in an afternoon. Now I bring them to every holiday party and they disappear fast.
Ingredients
- Unsalted butter: provides richness and a chewy crumb look for fresh sweet cream butter for best flavor
- Unsweetened cocoa powder: gives deep chocolate taste Dutch process makes them extra smooth
- Granulated sugar: ensures sweetness and moisture choose fine white sugar for easy blending
- Eggs: work as a binder and keep the brownies soft always use large eggs at room temperature for best texture
- Vanilla extract: adds warmth and rounds out the flavors pick a high-quality pure vanilla
- Apple cider vinegar: brightens the red color and heightens cocoa flavor optional but enhances classic red velvet
- Red food coloring: creates that signature hue gel gives the most vibrant results
- All purpose flour: holds everything together go for unbleached flour if possible
- Full fat cream cheese: is key for the cheesecake swirl room temperature ensures smooth blending
- Cheesecake layer sugar: keeps it creamy and lightly sweet opt for fine or caster sugar if you have it
- Egg: gives richness to the cheesecake layer prevents cracks
- More vanilla extract: adds that classic bakery flavor to the swirl
Step-by-Step Instructions
- Prepare Your Pan:
- Line an eight-inch square baking pan with parchment then let some hang over the sides for easy lifting. This step is crucial for those clean pretty brownie bars later.
- Make the Brownie Batter:
- Melt butter cocoa powder and salt together in a large microwave-safe bowl using 30 second bursts. Stir in sugar for a shiny thick base then whisk in eggs vanilla and vinegar if using. Add the food coloring until you love the shade. Carefully fold in flour just until the batter comes together so the brownies stay tender.
- Pour and Reserve:
- Set aside about one third cup of the batter in a small bowl for marbling. Spread the remaining brownie batter into your prepared pan and smooth the top evenly to all edges.
- Mix the Cheesecake Batter:
- Beat softened cream cheese and sugar together with a mixer or by vigorous hand whisking until completely lump free. Scrap sides well then add egg and vanilla mixing until totally smooth.
- Assemble and Swirl:
- Dollop spoonfuls of the cream cheese mixture over the brownie base. Drop spoonfuls of the reserved brownie batter around the top. Use the tip of a knife or a skewer to gently swirl the two together creating a gorgeous marbled effect. Do not overmix.
- Bake to Perfection:
- Place pan in the center of your preheated oven. Bake for 25 to 30 minutes until the cheesecake layer is just set and slightly puffed. Stick a toothpick in and look for moist crumbs from the brownie not raw batter. This is the secret to a fudgy bite.
- Chill and Slice:
- Cool brownies fully at room temperature then pop in the fridge for at least two hours to firm them up. Once cold lift from the pan using the parchment. Slice into squares with a warm sharp knife for best results. For even better flavor let them sit overnight.
 Pin
Pin
My favorite part is always the cheesecake swirl especially when it bakes up creamy but not too sweet. Once my niece and I spent a snowy afternoon marbling the tops for fun and she proudly told everyone she made them all by herself.
Storage Tips
Chill brownies in an airtight container right after slicing to lock in moisture and flavor. They keep well for five days in the fridge or up to three months in the freezer. If you like brownies a bit softer let them sit at room temperature for fifteen minutes before serving.
Ingredient Substitutions
No apple cider vinegar No worries. Just use white vinegar or omit it entirely but note the color may be slightly muted. If you prefer natural coloring you can use beet powder instead of red gel though the shade will be less intense. For a gluten free version swap all purpose flour for your favorite blend one that is made for baking.
Serving Suggestions
These look stunning on a dessert platter among fresh berries or a dusting of powdered sugar. Try cutting them into smaller squares for parties or stack with extra cream cheese swirl for a dramatic dessert tower. I love them with hot coffee or a scoop of vanilla ice cream on top.
Cultural Context
Red velvet is a beloved classic in the American South known for its deep red crumb and hint of cocoa. Pairing it with cheesecake swirl is a modern twist that started appearing in bakeries and quickly became a favorite for home bakers craving both flavors in one pan. These bars bring the best of two worlds right to your table.
Recipe Questions & Answers
- → How do I get the vibrant red color?
Use gel food coloring for the richest hue, adding more as needed after mixing with the other wet ingredients.
- → Should the cream cheese be at room temperature?
Yes, softened cream cheese ensures a smooth, lump-free cheesecake layer for easy mixing and swirling.
- → What’s the best way to swirl the batters?
Use a skewer or table knife and gently swirl in circular or figure-eight motions, being careful not to over-mix.
- → How can I tell when the bars are done baking?
Bake until the cheesecake is set and a toothpick inserted comes out with moist crumbs from the chocolate layer.
- → How should the finished bars be stored?
Keep in an airtight container in the fridge for up to five days to maintain freshness and texture.