 Pin
Pin
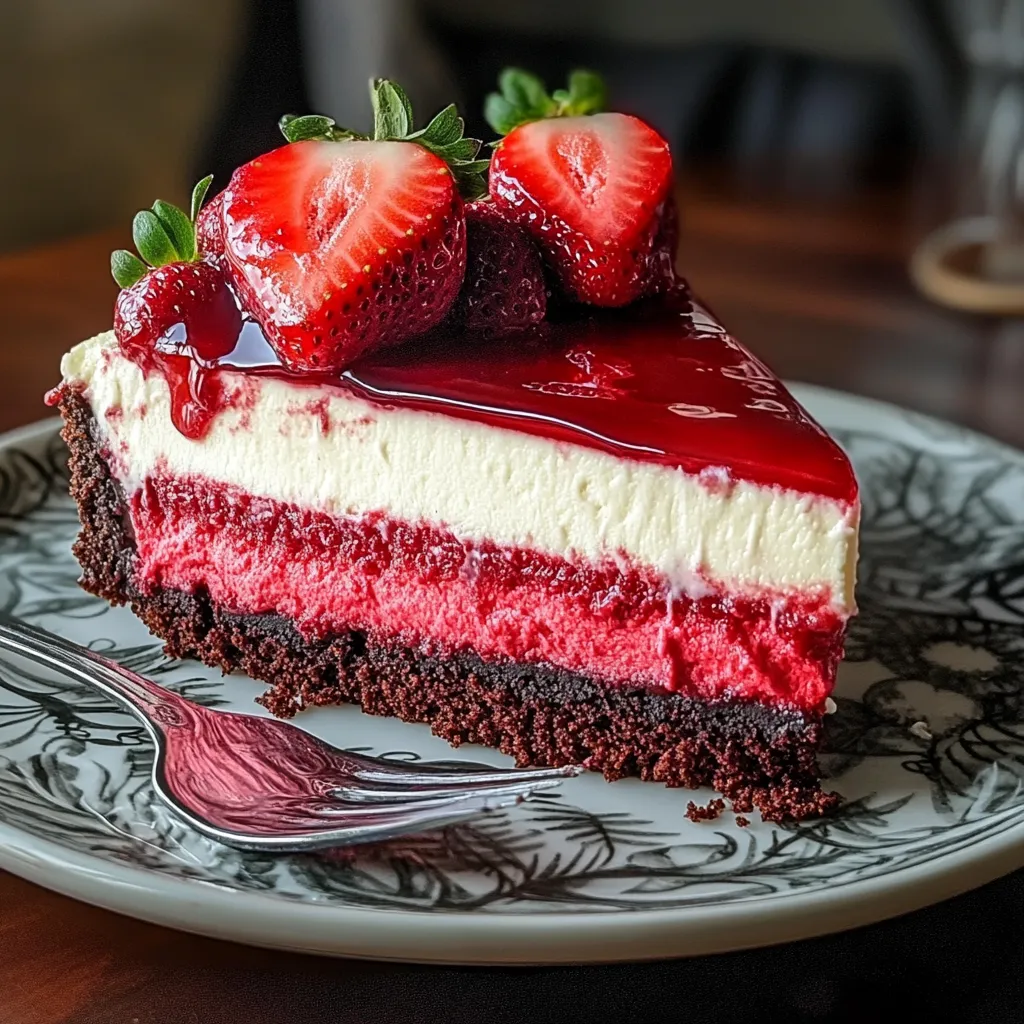
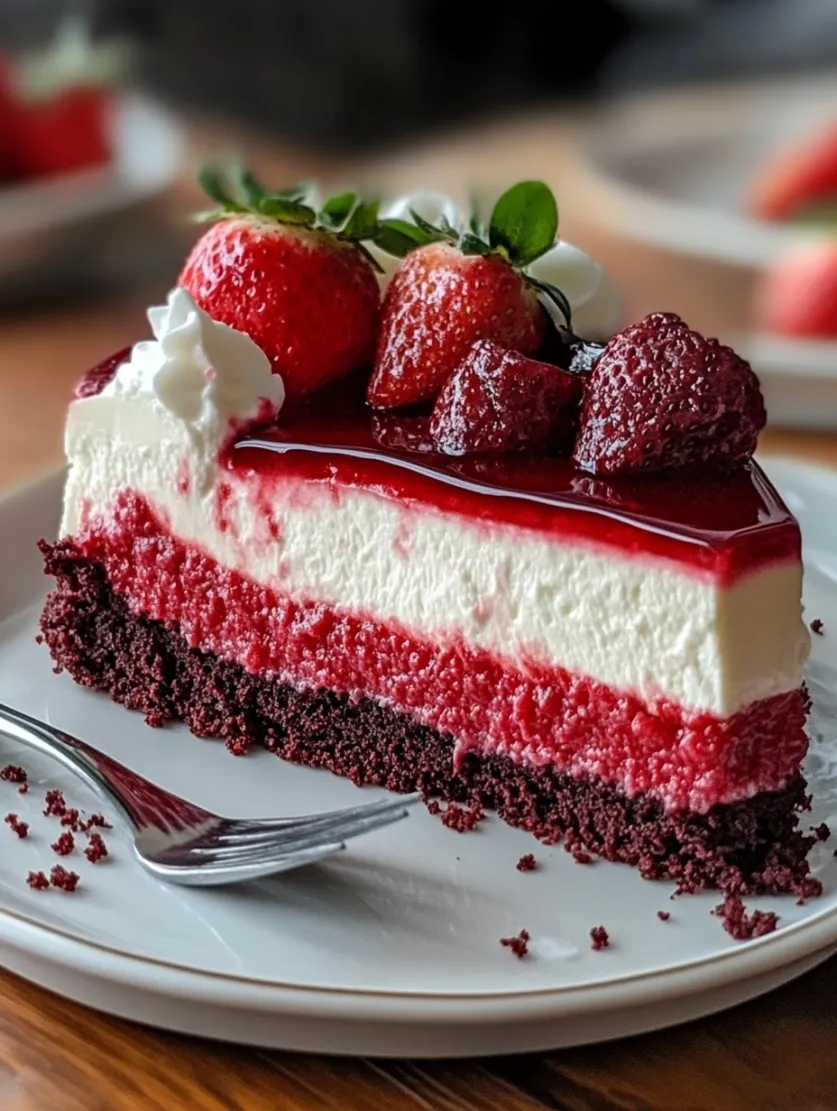
This red velvet strawberry cheesecake combines two beloved desserts into one stunning creation that's perfect for special occasions. The vibrant red cake layer supports a cloud of strawberry cheesecake filling, creating a dessert that's as beautiful as it is delicious.
I created this recipe for my daughter's 16th birthday when she couldn't decide between red velvet cake and strawberry cheesecake. The combination became an instant family classic that now makes an appearance at most of our celebrations.
Ingredients
For the Red Velvet Cake Base
- All purpose flour: Provides structure to support the creamy topping
- Granulated sugar: Balances the slight tanginess of the buttermilk and cocoa
- Cocoa powder: Just enough to provide that classic red velvet flavor without overwhelming
- Buttermilk: Creates tenderness and reacts with the vinegar for lift
- Red food coloring: Gives the dramatic color; look for gel coloring for the most vibrant results
- White vinegar: Activates with baking soda for the perfect rise and texture
For the Strawberry Cheesecake Filling
- Cream cheese: Use full fat for the richest flavor and texture
- Fresh strawberries: Select bright red ripe berries for the best flavor
- Heavy whipping cream: Makes the filling light and mousse-like
- Powdered sugar: Dissolves smoothly into the cream cheese mixture
Step-by-Step Instructions
- Prepare the Baking Pan:
- Line your springform pan with parchment on the bottom and lightly grease the sides. This crucial step ensures your red velvet base will release perfectly when it's time to serve.
- Mix the Dry Ingredients:
- Sift all dry ingredients together thoroughly to eliminate any lumps. This creates an even distribution of leavening agents and ensures your cake rises properly and has a consistent texture throughout.
- Combine Wet Ingredients:
- Whisk the oil, buttermilk, eggs, coloring, vanilla, and vinegar until completely smooth. The mixture should be vibrant red and have a uniform consistency before adding to the dry ingredients.
- Create the Batter:
- Fold the wet ingredients into the dry ingredients using a gentle hand. Overmixing will develop too much gluten, resulting in a tough cake. Stop mixing as soon as the last streaks of flour disappear.
- Bake the Cake Base:
- Pour the batter into your prepared pan and smooth the top with an offset spatula. The cake will rise during baking but settle as it cools, providing the perfect base for your topping.
- Prepare the Strawberry Puree:
- Hull and blend fresh strawberries until completely smooth. For the most intense flavor, let the puree sit for 10 minutes before straining to remove any seeds if desired.
- Create the Cheesecake Filling:
- Beat the cream cheese until absolutely smooth before adding any other ingredients. Any lumps at this stage will be impossible to remove later. Add the powdered sugar gradually to prevent a sugar cloud in your kitchen.
- Incorporate the Whipped Cream:
- Fold the whipped cream into your strawberry cream cheese mixture using a large spatula. Use a gentle under and over motion to maintain as much air as possible in the mixture for a light texture.
- Assemble and Chill:
- Spread the filling over the cooled cake in an even layer. The filling should be thick enough to hold its shape but still spreadable. Refrigerate for at least 4 hours, though overnight is even better.
 Pin
Pin
The first time I served this cake at a family gathering, my usually stoic father in law had three slices and asked for the recipe. The combination of textures from the cakey bottom to the fluffy strawberry layer creates an experience that elevates both classic desserts.
Make Ahead Instructions
This cheesecake actually improves with time, making it perfect for advance preparation. You can make the entire dessert up to two days before serving. The flavors meld together beautifully as it sits, and the texture of the red velvet base softens slightly to create the perfect bite. Just wait to add the fresh strawberry garnish until shortly before serving.
Strawberry Selection Secrets
For the most flavorful filling, choose strawberries at the peak of ripeness. Look for berries that are uniformly red with no white shoulders, fragrant, and slightly soft to the touch. Farmers market strawberries or those picked in season will provide the most intense flavor. If using out of season berries, you might want to macerate them with a tablespoon of sugar for 30 minutes before pureeing to enhance their natural sweetness.
Serving Suggestions
This stunning dessert needs little embellishment, but for special occasions, try creating a strawberry fan garnish on each slice. Additional serving ideas include a light dusting of cocoa powder, a drizzle of white chocolate, or a small sprig of mint for color contrast. For the ultimate presentation, place the cheesecake on a cake stand surrounded by whole strawberries and rose petals for a romantic touch.
Troubleshooting Tips
Sometimes cream cheese can be stubborn about softening properly. If you're in a hurry, cut it into small cubes and spread them on a plate for 30 minutes rather than leaving the block whole. If your red velvet layer seems dry, brush it lightly with a simple syrup before adding the cheesecake layer. And if your filling isn't setting firmly enough, you can place it in the freezer for 30 minutes before serving.
Recipe Questions & Answers
- → Can I use frozen strawberries for the cheesecake filling?
Yes, but make sure to thaw and drain them properly to prevent excess moisture in the filling.
- → What pan size is ideal for this recipe?
A 9-inch springform pan works best for easy removal and layering of the dessert.
- → How long should the cheesecake set in the refrigerator?
Allow at least 4 hours for the cheesecake to chill and set properly before serving.
- → Can the red velvet cake be made ahead of time?
Yes, the red velvet cake base can be baked a day in advance. Just keep it covered to maintain freshness.
- → What can I substitute for buttermilk in the recipe?
You can use a mix of milk and lemon juice or white vinegar (1 cup milk + 1 tablespoon acid) as a buttermilk substitute.