 Pin
Pin
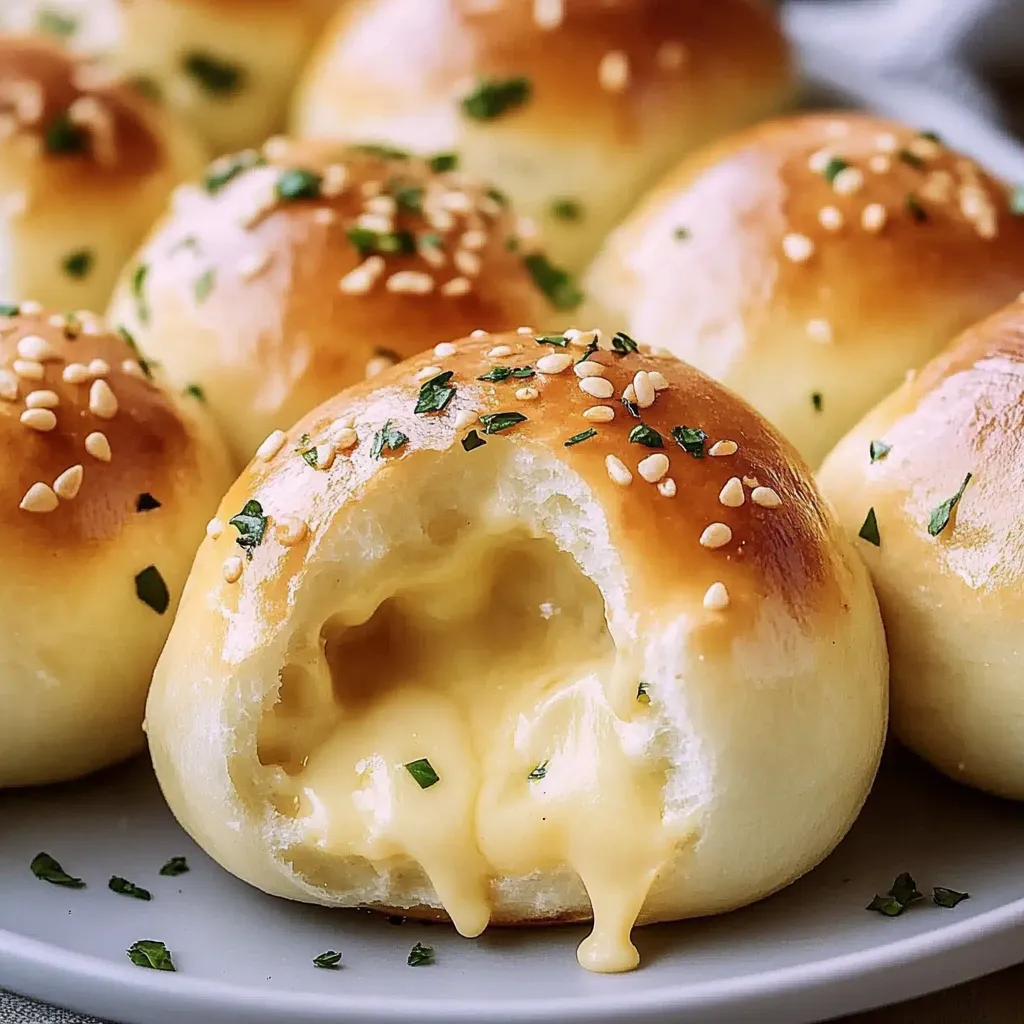
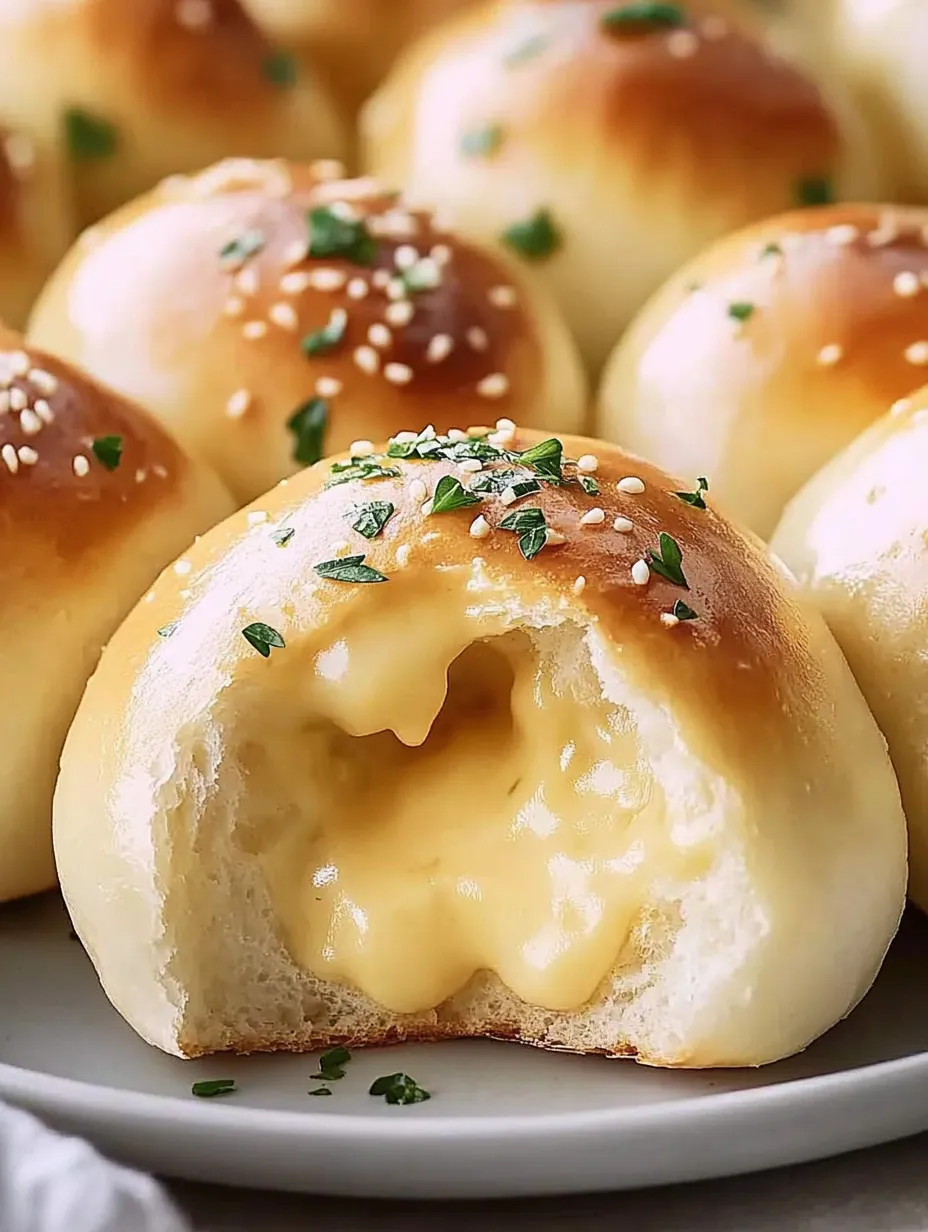
Cheesy Garlic Bombs are the kind of snack that never last long at my gatherings. Filled with gooey mozzarella and brushed in garlicky butter, they turn any meal or party into something a little more special. Whether you are feeding a crowd or just craving something warm and cheesy, these are the bites I reach for when I want simple comfort.
I made these for a potluck once and they disappeared faster than anything else on the table. Now whenever friends ask me what to bring I just volunteer these cheesy bombs every time.
Ingredients
- Frozen Texas rolls: Soft fluffy dough that bakes up golden look for quality brands like Rhodes that thaw evenly
- Mozzarella cheese sticks: Creamy and stringy when melted choose full-fat for the best gooey texture
- Salted butter: Rich base for the garlic butter brush
- Garlic cloves: Freshly minced for a strong real flavor never use pre-chopped for this
- Parsley flakes: Fresh if possible for brightness dried works in a pinch
Pick rolls that are fully thawed and stretchy and never use cheese sticks that feel rubbery or dry.
Step-by-Step Instructions
- Thaw the Rolls:
- Arrange the frozen rolls on a plate and cover tightly with plastic wrap. Refrigerate at least four hours or overnight so they rise and become pillowy. Rushing this step gives dense bombs instead of airy ones.
- Prep the Oven and Cheese:
- Set your oven to three hundred fifty degrees Fahrenheit. Line a baking sheet with parchment paper so nothing sticks. Cut each mozzarella stick into one-inch nuggets to fit inside the dough perfectly.
- Shape the Bombs:
- Take each roll and gently press it flat with your hands into a small disk. Do not use a rolling pin or the dough may tear. Place two cheese nuggets in the center of each disk.
- Seal:
- Bring up the edges and pinch firmly so every seam is closed. Place each ball seam side down on your prepared tray to keep the cheese inside as they bake.
- Bake:
- Slide the tray into the preheated oven and bake for ten minutes or until golden brown. Keep a close eye after nine minutes as ovens vary.
- Make Garlic Butter:
- While the bombs bake gently melt the butter. Stir in the minced garlic and parsley right after melting to wake up the fresh flavors.
- Finish:
- When the bombs come out of the oven immediately brush with the garlic butter making sure every spot glistens. Let them cool just a bit so the cheese does not burn your mouth.
 Pin
Pin
I love parsley in this recipe since it brings such a fresh pop of color. My favorite memory is making these for my little cousin’s birthday when he declared them better than pizza. The smile on his face is what made all the kneading and baking worth it.
Storage Tips
Cool any leftovers completely before storing in an airtight container to prevent sogginess. They stay fresh for up to two days at room temperature or freeze for a month. Reheat in a hot oven until the cheese is melty and the bread crisps up again.
Smart Ingredient Swaps
No Texas rolls on hand use store-bought pizza dough just let it come to room temperature before shaping. For a spicy kick stuff in a slice of jalapeño with your cheese or try a smoked mozzarella for extra flavor depth.
How to Serve Cheesy Garlic Bombs
These are wonderful served right out of the oven as a starter alongside a bowl of marinara. They also make a fantastic brunch side paired with scrambled eggs or tucked into a picnic basket for road trips. I have even served them as a bread basket replacement during holiday dinners.
A Little History
Pull-apart breads and stuffed rolls like these have roots in American potlucks and holiday gatherings. The trend of "bomb" recipes picked up as cooks wanted comforting finger food with maximum flavor and minimum utensils. Garlic and cheese is a classic combination that never goes out of style.
Recipe Questions & Answers
- → What kind of cheese is best for cheesy garlic bombs?
Mozzarella is preferred for its excellent melting quality and mild flavor, ensuring gooey centers that stretch beautifully when pulled apart.
- → Can I use homemade dough instead of frozen rolls?
Absolutely! Homemade dough works well and can give a slightly different texture and flavor. Adjust rising and baking times as needed.
- → How do I prevent cheese from leaking out?
Firmly pinch and seal the dough edges before baking. Placing the seam side down on the baking sheet helps keep the filling inside.
- → Are these suitable for making ahead?
Yes, you can assemble them in advance and refrigerate before baking. Brush with garlic butter and bake just before serving for best results.
- → Can I add extra flavor to the garlic butter?
Add herbs like oregano or a little grated Parmesan to the butter for extra depth of flavor. Red pepper flakes provide a mild kick if desired.