 Pin
Pin
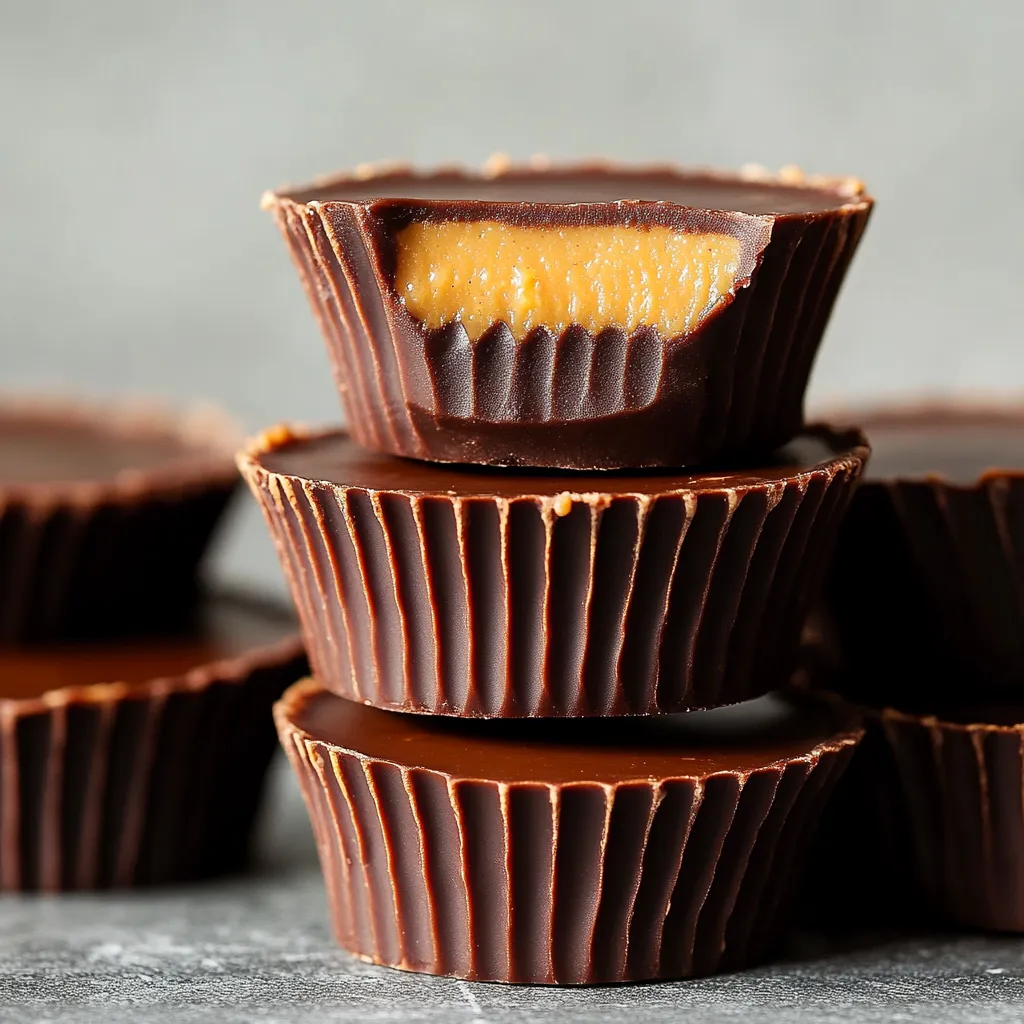
This homemade peanut butter cup recipe transforms simple pantry ingredients into decadent treats that outshine store-bought versions. The perfect balance of rich chocolate and creamy peanut butter creates an irresistible dessert that disappears quickly whenever I make them.
I discovered this recipe during a late-night chocolate craving when the stores were closed. What started as a desperate attempt to satisfy my sweet tooth has become my most requested dessert at family gatherings.
Ingredients
- Dark or milk chocolate chips: Provide the perfect shell texture and can be chosen based on how sweet you prefer your treats
- Coconut oil: Helps create silky smooth chocolate that sets beautifully and gives a clean snap when bitten
- Creamy peanut butter: Forms the luscious filling and natural varieties work best for authentic flavor
- Powdered sugar: Balances the savory notes of peanut butter and helps create the perfect consistency
- Vanilla extract: Adds depth and warmth to the peanut butter filling
- Salt: Enhances all flavors and creates the perfect sweet-salty balance that makes these cups addictive
Step-by-Step Instructions
- Melt the Chocolate:
- Heat chocolate chips and coconut oil in 30-second microwave bursts stirring thoroughly between each interval until completely smooth. Be patient with this step as overheating will make the chocolate grainy. The mixture should look glossy and flow easily from your spoon.
- Create the Base:
- Line a mini muffin tin with paper liners and pour approximately one teaspoon of melted chocolate into each cup. Use the back of your teaspoon to push the chocolate slightly up the sides of the liner creating a shallow cup shape. Place in freezer for 5 minutes until the chocolate is firm but not completely hard.
- Prepare the Filling:
- While the bases chill mix peanut butter powdered sugar vanilla and salt in a small bowl until completely incorporated. The mixture should hold its shape but still be soft enough to spread. If too stiff add a tiny bit more peanut butter if too runny add more powdered sugar.
- Add the Peanut Butter Layer:
- Remove muffin tin from freezer and place half a teaspoon of peanut butter mixture onto each chocolate base. Gently press down with your finger or the back of a spoon to create an even layer leaving a small margin around the edges for the chocolate to seal.
- Top with Chocolate:
- Spoon another teaspoon of melted chocolate over each peanut butter center ensuring complete coverage. Tap the pan gently against the counter several times to remove air bubbles and create smooth tops. If needed use a toothpick to spread chocolate to the edges.
- Chill to Set:
- Place the filled cups in the freezer for 15 to 20 minutes or refrigerate for 30 minutes until completely firm. The cups should release easily from the liners when fully set.
The coconut oil is my secret ingredient in this recipe. While optional it dramatically improves the texture of the chocolate making it smoother on the palate and preventing the common issue of chocolate that cracks and crumbles when you bite into it. I learned this trick from my grandmother who always added a small amount of fat to her chocolate dipped treats.
Storage Solutions
These peanut butter cups maintain their quality remarkably well in proper storage. Keep them in an airtight container in the refrigerator where they will stay fresh for up to two weeks. For longer storage place the cups in a freezer safe container separating layers with parchment paper and freeze for up to three months. When ready to enjoy allow frozen cups to thaw for 10 minutes at room temperature for the perfect texture.
Creative Variations
While the classic recipe is perfect as is trying different nut butters opens up exciting flavor possibilities. Almond butter creates a sophisticated flavor profile perfect for dinner parties. Cashew butter offers a milder sweeter taste that children particularly enjoy. For a twist try adding a thin layer of jam between the peanut butter and top chocolate layer creating a PB&J cup experience. Cookie butter can replace peanut butter entirely for a spiced European inspired treat.
Allergen Friendly Adaptations
This recipe easily adapts to accommodate common dietary restrictions. For dairy free or vegan versions select dairy free chocolate chips and ensure your powdered sugar is free of animal products. Those with peanut allergies can substitute sunflower seed butter which mimics peanut butter texture while providing a safe alternative. For those monitoring sugar intake sugar free chocolate chips and a natural sugar substitute like powdered monk fruit can be used in place of traditional ingredients without sacrificing taste.
Recipe Questions & Answers
- → Can I use crunchy peanut butter instead?
Yes, using crunchy peanut butter or mixing in crushed peanuts adds texture and a delightful crunch to the filling.
- → How do I make these dairy-free?
Opt for dairy-free chocolate chips and ensure any additional ingredients, like butter, are plant-based to create a vegan-friendly version.
- → How should I store peanut butter cups?
Store them in an airtight container in the fridge for up to 2 weeks or freeze them for up to 3 months to enjoy later.
- → Can I use white chocolate instead of dark chocolate?
Absolutely! White chocolate can be used for a sweeter variation or even layered with dark chocolate for a unique twist.
- → What prevents the chocolate from melting quickly at room temperature?
Adding a small amount of coconut oil or butter to the melted chocolate helps it set more firmly and prevents it from melting too quickly.